Compiling means rebuilding the actual executable program from its source code.
MAME is almost fully written in C, with some DOS-specific assembler hacks in
speed-critical places. The DOS version of MAME is compiled with DJGPP, which is
the DOS port of a C compiler called GCC and its libraries.
This particular how-to is written for MAME 0.36 final, but with a bit of luck
you can compile other versions with the help of this page. Since this how-to
tells how to compile the DOS MAME, it isn't too useful with Windows NT or 2000
so you should use Windows 95 or 98. If you need to compile MAME32 (to be used with Windows 9x, NT4 or 2000), take a look at
http://www.hypertech.com/mame/.
The
DJGPP development environment will be installed to C:\DJGPP
and MAME sources will be placed into C:\DJGPP\MAME.
Before beginning, you should make sure that you do not have the directories
c:\djgpp\ and c:\download\ yet.
If you do have them, rename them to another name or simply delete them (if you are sure that there
aren't any important files in there).
Remember, when you type commands into the command prompt, you should avoid making typos ;-)
In this how-to, filenames and other static text are marked with the color yellow
and command lines or other information that you need to type in are marked with the color green.
Last updated: 7th May 2000.
1. get unzip
First of all, most files that are transferred over the Internet are compressed,
to minimize download times and bandwidth costs. You might already have a
Windows-based uncompressing utility, but since compiling MAME is done in a
command prompt, a different kind of utility is necessary. Download the
following file into the directory
c:\windows\command\ so that the
utility is accessible from any directory.
| File name |
File size |
Description |
| unzip.exe |
140 kB |
This is the Info-ZIP uncompressing utility called UnZip/NT v5.41. |
2. get djgpp
Then you need the DJGPP files. Make a new directory, for example
c:\download\ and
download the following files into that directory. Note that there may be newer
versions of these files, but MAME is not verified to compile with any other
versions of the following files.
| File name |
File size |
Description |
| djdev203.zip |
1502 kB |
This file contains the development kit and C libraries v2.03. |
| bnu281b.zip |
1852 kB |
This file contains the GNU binary utilities v2.8.1. |
| gcc2952b.zip |
1888 kB |
This file contains the actual C compiler, GCC v2.95.2. |
| mak3781b.zip |
256 kB |
This file contains the GNU make v3.78.1. |
3. uncompress djgpp
Next we will uncompress the DJGPP files and set up some environment variables
so that DJGPP is functional. Open up a command prompt. You can find it either
from under Start Menu - Programs, or you can simply select Run and type
command.com into the dialog box. When you have it open, type
cd \download and hit enter to change to the correct directory. After that,
type unzip *.zip -d c:\djgpp\ and hit enter to start uncompressing
the DJGPP files.
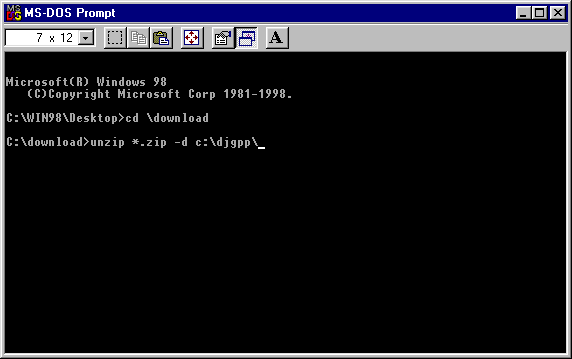
Before uncompressing..
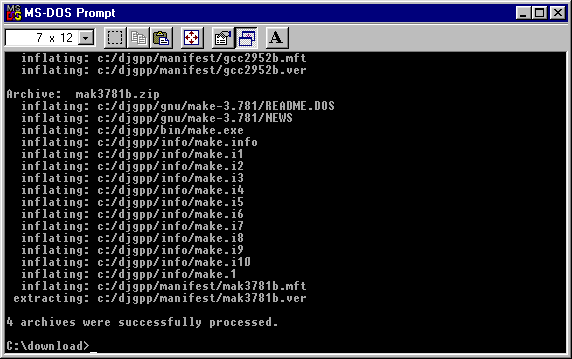
After uncompressing..
If you do not see the message "4 archives were successfully processed.",
re-download the archives. If you get a "Bad commmand or file name", verify once
again that you have unzip.exe in
c:\windows\command\
4. set up djgpp
Next we will have to set up the environment variables. To make the changes
permanent, we will have to edit AUTOEXEC.BAT, which is a file that always gets
run before Windows starts up. Type edit \autoexec.bat and hit
enter. There might be a lot of things in there, so do not touch anything else
than what you are told to.
Find the line which says something like PATH C:\WIN98;C:\WIN98\COMMAND
(there might be some other directories defined after these two). Add ;C:\DJGPP\BIN
to the end of that line, so that it will look like PATH C:\WIN98;C:\WIN98\COMMAND;C:\DJGPP\BIN
(again, there might be something extra in there, leave them as they are).
After that, hit enter to make a new line. Type SET DJGPP=C:\DJGPP\DJGPP.ENV
into that line. Now you can save the file (ALT-F then S) and quit (ALT-F then X) (These might differ depending on your language version of Windows). Then you will
need to reboot your computer, to make the changes effective.
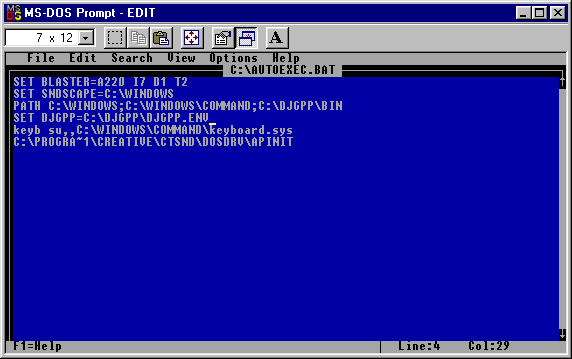
An example of AUTOEXEC.BAT after editing..
5. get add-ons
Now DJGPP should be functional. Then you will need several add-on libraries and
programs that MAME uses. Download the following files into
c:\download\. Note that there may be newer versions of these files, but MAME is not
verified to compile with any other versions of the following files.
6. install upx & nasm & seal
The last three are the easiest to install. Open up the command prompt again,
and type cd \download. Then type unzip upx101w.zip upx.exe -d c:\djgpp\bin\
and hit enter, type unzip nasm098.zip nasmw.exe -d c:\djgpp\bin\ and hit enter
and type unzip mameseal.zip -d c:\djgpp\ and hit enter.
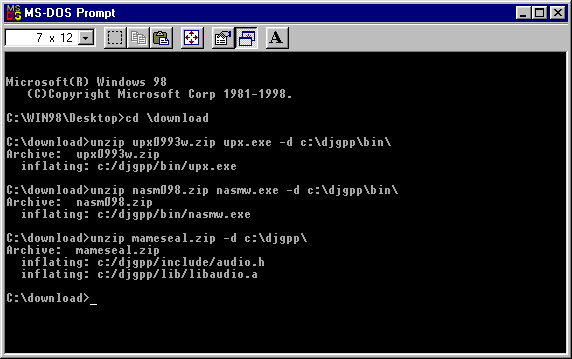
After uncompressing UPX, NASM and SEAL
7. install allegro
Then we will install Allegro. Type unzip all3932.zip -d c:\djgpp\ and hit
enter.
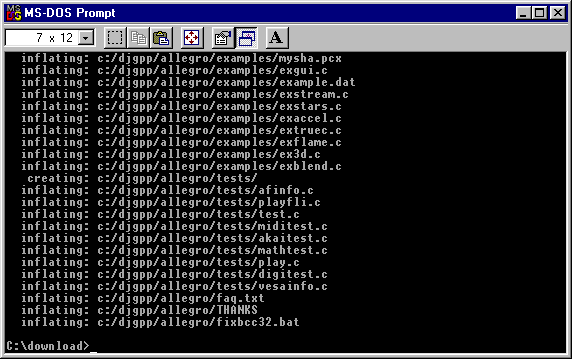
After uncompressing Allegro
Allegro is a library, which needs to be compiled. Type cd \djgpp\allegro
to go to Allegro's directory, then type make lib and hit enter. This will
take a while. After it is done, type make install and hit enter.
The compiling went fine if you get the message "The optimised djgpp library has
been installed".
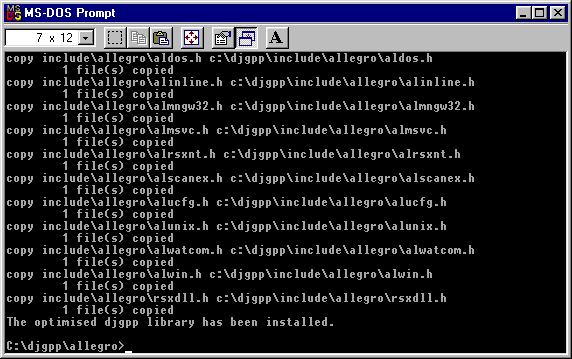
After compiling Allegro
8. install zlib
Then we will install zlib, the add-on library that enables MAME to read ZIP files. Type
unzip zlib113.zip -d zlib\ and hit enter. Go to the directory by typing
cd zlib and compile it by typing make -fmsdos\makefile.dj2
and hitting enter.
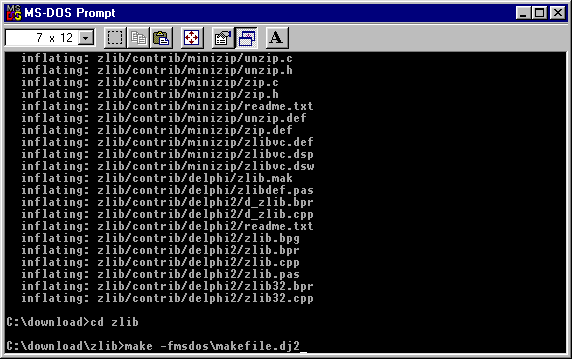
Before compiling zlib
When it is done, you need to copy three files into DJGPP's directories. Type
xcopy libz.a c:\djgpp\lib\ and xcopy zlib.h c:\djgpp\include\
and xcopy zconf.h c:\djgpp\include\
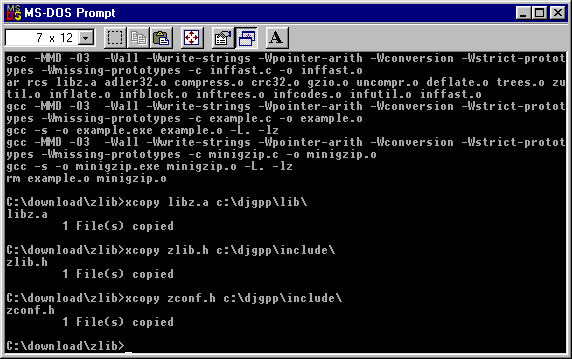
After compiling zlib
9. compile mame
Now you can compile MAME. Download the source ZIP into c:\download\
| File name |
File size |
Description |
| mame036s.zip |
3971 kB |
This is the source archive of MAME version 0.36 final. Total of 2048 games supported. |
Go to the download directory by typing cd \download and uncompress
the MAME sources by typing unzip mame036s.zip -d c:\djgpp\mame\.
Usually the MAME sources are compressed twice to squeeze them into an even
smaller space. Go to the MAME source directory by typing cd \djgpp\mame
and uncompress the second zip by typing unzip *.zip
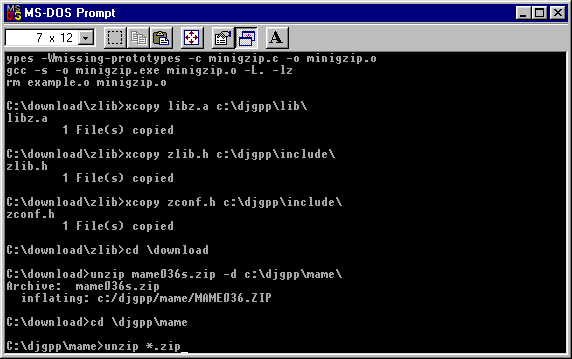
Before uncompressing MAME's second zip
When the uncompressing is done, you might want to delete the second zip by typing
del mame.zip (This is not
necessary if you are sure you have enough space on your drive). Then you
can compile MAME. Type make and hit enter. This will
finally compile MAME itself. If you want to compile the CPU optimized versions,
type make I686=1 or make K6=1 instead of just make.
It will take a lot of time, ranging from 15 minutes to an hour depending on your
CPU speed, so go get yourself something to drink.
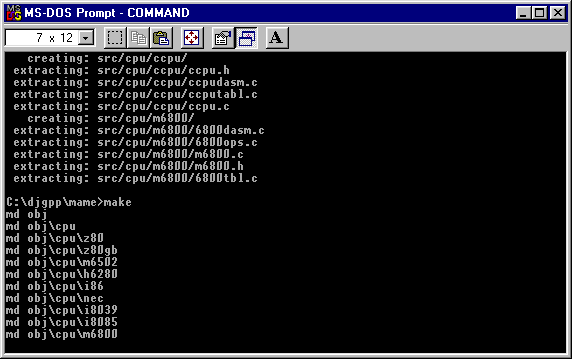
Starting to compile MAME
If you get an error message like "Error -1" after a line that starts with "nasmw -o",
you have not installed nasmw.exe correctly. Read the section "6. install upx & nasm & seal" again.
At some point, the compilation might crash the command prompt or simply stop
with a message like "no DPMI selectors". Don't worry, it is normal. Fortunately,
the compilation will continue just fine from where it crashed. Open
the command prompt again, change to the correct directory and type
make again (or the
CPU-specific commands
make I686=1 or
make K6=1
if you are building a CPU-specific compile).
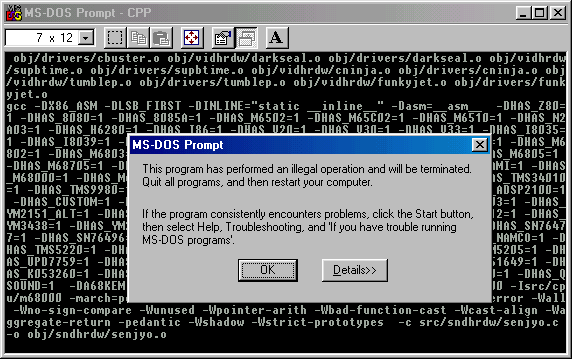
Compilation might crash
When the compilation is done, you can type dir. You should see
a brand new MAME.EXE in there.
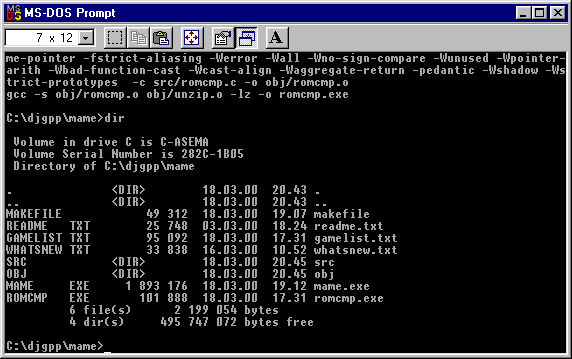
Compilation ready
To be able to use MAME, you should make the directories that MAME expects to
exist. Type
md artwork, md cfg, md hi, md inp, md memcard, md nvram, md roms, md samples and md snap.
Congratulations, you did it!
10. a new mame appeared
To successfully compile a new version of MAME, you should NOT uncompress a new set
of sources over an old version of MAME. Instead, rename the MAME directory to another
name or simply delete it totally (if you are sure that nothing important is there),
and then uncompress the new set of sources to an empty directory.
11. new mame requires new allegro?
If this happens, you first need to remove the old Allegro files. Go to the main
DJGPP directory (cd \djgpp)
and delete the whole Allegro directory by typing deltree /y allegro.
Then you need to delete the Allegro library by typing del lib\liballeg.a
and the Allegro header files by typing cd include,
del allegro.h and
deltree /y allegro.
After that, follow the instructions of section "7. install allegro" again and hope for the best.
12. then what..
Of course, the biggest advantage of building your own binary is the possibility
to tinker around with the source files. For example, to try out drivers which are
not fully working yet, take a look at the file src\driver.c
with a normal text editor (like EDIT). The disabled drivers are marked with the
text TESTDRIVER. Simply remove the TEST part from a driver you want to test, save the file and type
make again. Remember,
the license forbids you from redistributing binaries that contain games which
are disabled in the official versions. Naturally, there should not be any reasons to redistribute
such binaries since this page makes it easy for everybody to build their own binaries.
You might notice that the UPX part takes an obscene amount of time. The simplest
solution to avoid it is to just rename upx.exe
to another name. If you do that, the make utility will give you an error and
the file MAME.EXE is
about 8 MB, but it should work fine.
13. debug modes
To include the debugger functionality in your MAME executable, edit
makefile. Near the
top you will see a text like "uncomment next line to include the debugger".
Remove the # character from the next line, so that it only has DEBUG = 1
in that particular line. Save the file, type make clean
and then make.
To actually use the debugger, edit MAME.CFG
and find the line that says debug = no.
Change it to debug = yes
and save the file. In MAME, hit tilde ( ~ ) or key to the left of the key 1 to enter
the debugger.