Pixotosco: homebrew on Gunsmoke PCB

Back in 2013, for approximately 6 months I organized weekly meetings at the local hackerspace (Garoa Hacker Clube) called Retro-coding Workshops – in Brazilian Portuguese, “Oficinas de Retroprogramação”. It all started when I decided to dedicate some ammount of time each week to study reverse engineering of digital electronics devices. And I decided to do it at the hackerspace instead of at my home, because if anyone got interested in learning this kind of stuff, it would be a good opportunity of sharing the knowledge. And if no-one showed up, I would be dealing with the subject anyway. One or two people actually got interested and started to show up weekly for the workshop and we got a good vibe and the workshops lasted several months!

RetroCoding Workshops - Oficinas de Retroprogramação

Naturally, MAME (and back then MESS) was a recurring topic on those workshops, both as a tool and also as an educational asset. The source code of these emulators are effectively unofficial documentation of the inner workings of the emulated devices (both arcade games and also all sorts of other electronic equipment) and this enables a programmer to learn how to develop software targeting those specific boards.

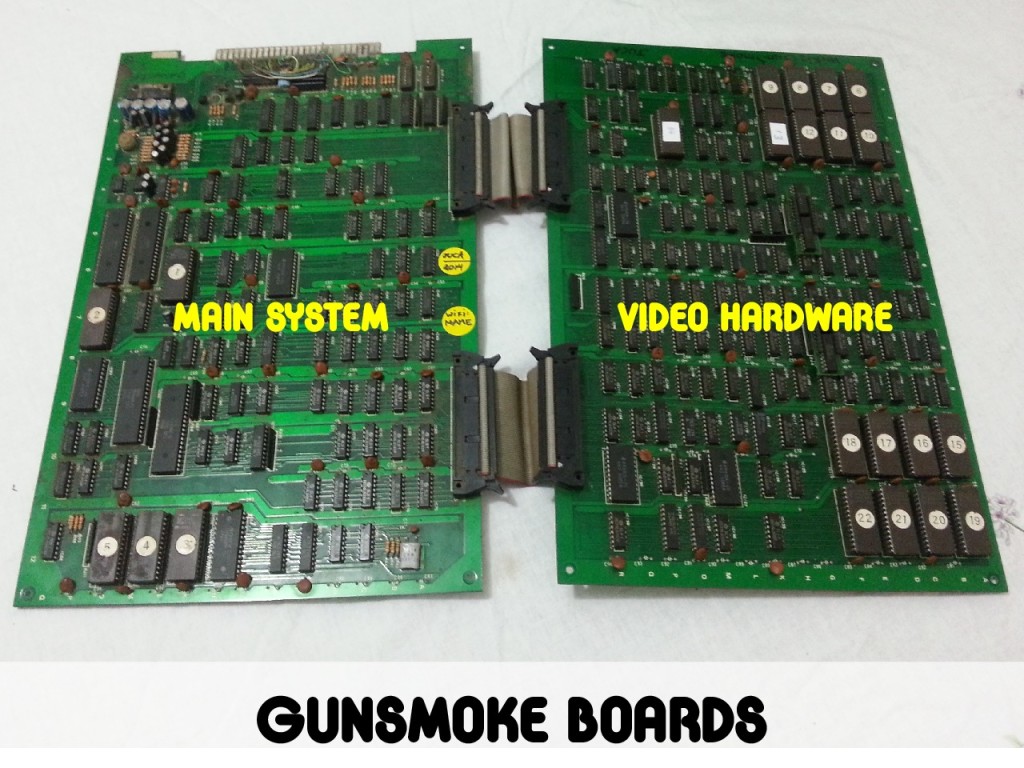
As I wanted to learn more about digital electronics design and emulation techniques, I decided to buy an arcade board which already had good emulation in MAME. So I ordered on MercadoLivre (a website that’s similar to eBay) a 1985 CAPCOM GunSmoke arcade board.

By reading the GunSmoke driver source code while simultaneously inspecting the PCB circuits with a multimeter’s continuity test mode I was able to understand both the TTL logic circuitry as well as the emulation framework employed by MAME. And with that I also grasped how one was supposed to code a game targeting that specific board.

In order to demonstrate that I had understood at least the basics of how it worked I decided to implement a proof-of-concept. I wrote a tiny (and incomplete) “snake” clone but using a pixelated alligator as the game character.

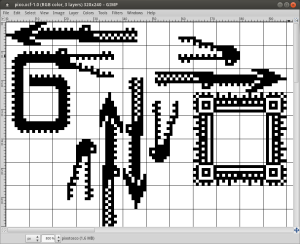
Drawing char-tiles on GIMP

Pixotosco is a character created by the Brazilian grafitti artist Tony de Marco, who’s also a close friend and a mamber of the hackerspace. One can find Pixotosco in many walls of São Paulo, Brazil. It’s sort of an alligator with a very long and pixelated body. It’s made of rectangular shapes that reminds us of pixels, but it’s actually curvy with its body swinging along the walls.

I recorded a video of the proof of concept and published it on YouTube. Bear in mind that this is really just a proof-of-concept and probably will never really become a full game.

There’s no collision detection, so the alligator can safely cross its own tail. It can even walk past screen borders! When moving to the top, it shows up in the bottom, which reflects the video memory layout and reminds of the fact that the monitor is in a 90 degrees orientation with the scanlines (and video memory addressing) along vertical lines.

Another glitch can be seen when the alligator moves to the right, effectively trying to draw chars outside of the char-tile RAM region. The next region of video RAM is dedicated to per-char palette selection. The side effect is that we see the alligator tail changing color, but also some garbage showing up in some places. The reason for that is because the clean screen routine does not really clean the garbage, but only selects a fully transparent palette for all chars on the screen. Perhaps I should have implemented it differently. But then I would not have had the opportunity of explain this here… 😉

GunSmoke boards

Main source code is written in C and cross-compiled targeting the Zilog Z80 CPU (a classic from the 80s). The bootloader had to be entirely written in Z80 assembly language, but it is a rather short and simple piece of code that only serves the purpose of setting up a minimal C runtime for the rest of the code. All graphics assets were drawn on GIMP and automatically converted to the specific char-tile data format used by the video circuitry of this PCB. The image data conversion is actually performed by a helper tool that I implemented in C. There’s also the need to generate palette-ROM binaries with the colors we want the images to be displayed with. The several binary files that are output by the build system (with a nice Makefile) are loaded into MAME where I can test it and validate if it’s looking and playing good.

Once I got it working on the emulator, I used my universal programmer and burned the data into actual EPROM chips and placed them in the original arcade board. In the mean time I bought myself an arcade cabinet and was able to play my proof-of-concept in the original GunSmoke board. It was a pretty exciting moment!

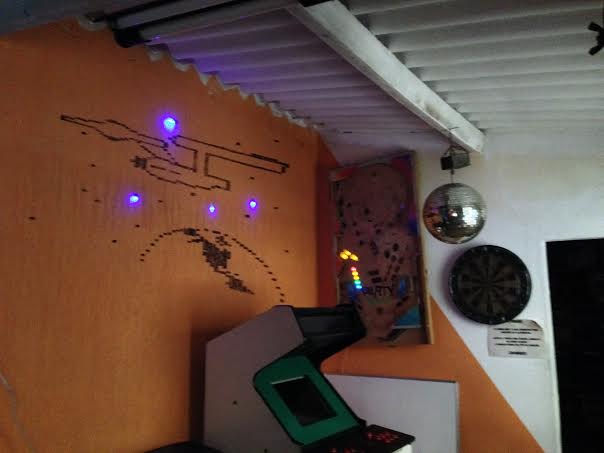
garoa arcade room

All of the source code is published on this github repo.

Happy Hacking,

Felipe “Juca” Sanches

Hardware reverse engineering insights from the MAME Project

This is my presentation at the annual Free Software Foundation meeting (LibrePlanet conference) held at MIT, on March 2016.

Hardware reverse engineering insights from the MAME

Felipe Correa da Silva Sanches, software freedom activist

The MAME Project’s main stated goal is to preserve historical computer hardware. The strategy for achieving that objective is to inspect the devices and then develop emulators for them. While most hardware is undocumented and relies on proprietary firmware, the MAME development community has nurtured strong reverse engineering practices since its origins back in 1997.

The techniques that we need to master in order to develop new emulators include reverse engineering procedures that are also very useful for aiding in the creation of free firmware solutions to replace the non-free blobs used in a broad variety of daily-use devices. These skills are also useful for the development of free drivers for undocumented devices and in the porting of operating systems and BIOSes to new hardware platforms. We need to strengthen a community of skillful hardware reverse engineers so that we can solve the freedom issues denounced by projects such as Linux-Libre and Libreboot.

More info at the LibrePlanet MediaGoblin instance.

Recovering a dead CPS2 board – Street Fighter Zero 2 (Brazil)

My weekend at the hackerspace was fun indeed. I spent the whole Saturday (March 5th, 2016) afternoon and night (up to Sunday 4am) trying to resuscitate a dead CAPCOM CPS2 arcade board. The game used to be Street Fighter Zero 2 (Brazil). But as the suicide battery was dead, it means the board lost the crypto key that it typically stores in an internal static RAM backed by the battery. So, without the correct key, the CPU can’t run the encrypted ROM code any more.

Luckily, years ago people figured out that the crypto-CPUs from CPS2 boards behave as a normal CPU capable of running unencrypted code when the battery is dead. So all we need to do to restore this arcade board is to replace the ROMs in it with a set of decrypted ones. Some people such as the CPS2 ROM Decryption Effort have put the effort to manually decrypt the ROMs of several CPS2 games. It is a time consuming task, so not all games are already decrypted. That’s the case for the game I had in my CPS2 board.

But there’s a similar game, a variant of it called Street Fighter Zero 2 Alpha (Brazil), which is already decrypted. And it uses the same graphics and sound assets (which were already originally unencrypted memory chips), so there’s no need for me to change all those chips, but only a few code EPROMs (6 in total). So I did it and after some struggling, which included instaling a “CPS2 suicide test” ROM developed by Razoola, I finally got the board to boot. Everything works nicely except the video. I can see the intro of the game, the music and sound effects are perfect, but the graphics are partially corrupted.

The current state is that 50% of the screen (every odd vertical strip of tiles) displays good graphics while the other 50% is corrupted. I could not yet figure out what’s wrong, but I could verify that the graphics assets ROM contents are perfect, so it must be some issue with the addressing circuitry to select those ROM chips. I think the culprit may be the BGS-B3D PAL16L8 chip in the B-Board.

I was too tired to continue, so I packed things and went home. I’ll have to resume the investigation another day. But it sure was fun and I almost got it working perfectly.

[[ This is a quick posting. I may tweak it in the future and add photos or other aspects of the ongoing effort. So be sure to revisit it from time to time 😀 ]]

A pleasant visit to the University

Today I visited the engineering school of the University of São Paulo, where I studied 10 years ago. The reason for my visit was to get in contact with professors and laboratory technicians who may have access to 3D scanning equipment.

Recently I have been experimenting with 3D modeling of arcade cabinets while building a prototype for a 3D artwork system for MAME. There’s some technical discussion and brainstorming about that in this issue on GitHub, as well as python source code and OpenSCAD 3D modeling scripts in this other git repository.

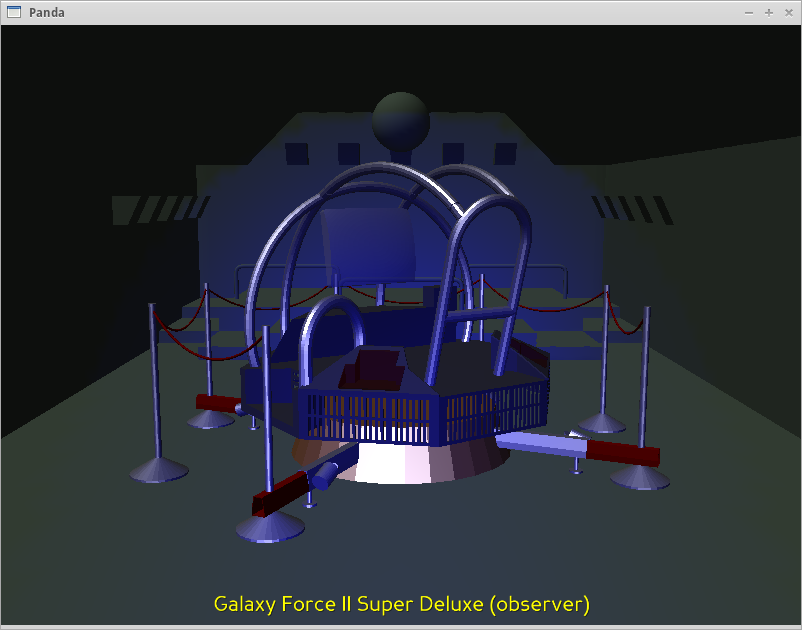
gforce2sd_observer

Even though Galaxy force 2 Super Deluxe still does not provide motor control signals (because the motor-cpu firmware still needs to be reverse engineered and emulated), one can try the 3D artwork system by running the Power Drift driver together with the gforce2 3D model. It is a hack, indeed, but it is just meant to serve as a proof of concept of the system and its proposed XML schema for describing scenes.

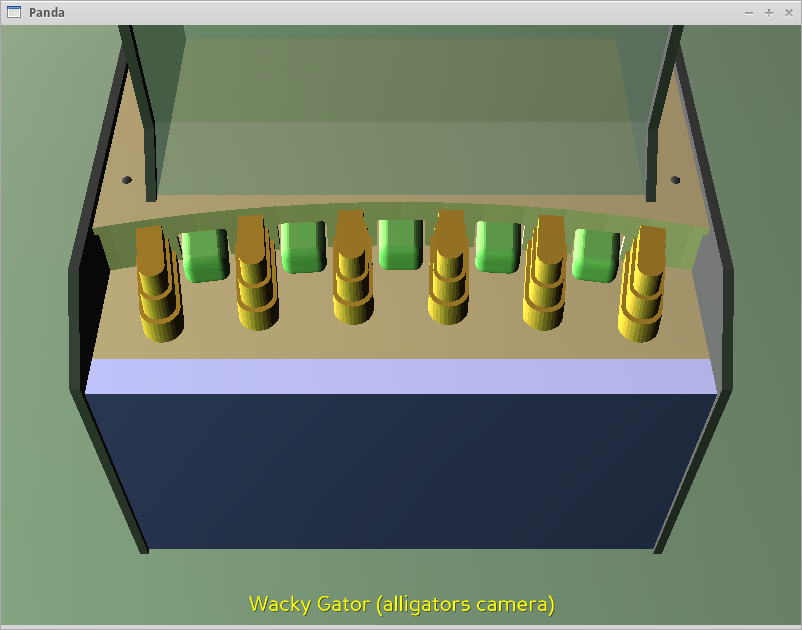
This is also related to the Wacky Gator driver that I bootstrapped and that Sandro Ronco made work perfectly, as described here by David Haywood’s recent blogpost. And Wacky Gator can already be played with the 3D artwork system prototype 😀

wackygtr_alligators_cam

But the alligators in the game are represented as simple blocky green shapes. So, the natural extension of this idea would be to add 3D scanned objects to the scene. And that’s why I was at University of São Paulo today.

But while there, I ended up talking to the technicians of the digital electronics laboratory. And then it reminded me of the prototyping panel that we used to deal with in some of our lab classes. I asked about it and they brought one of those boards for me to take a look.

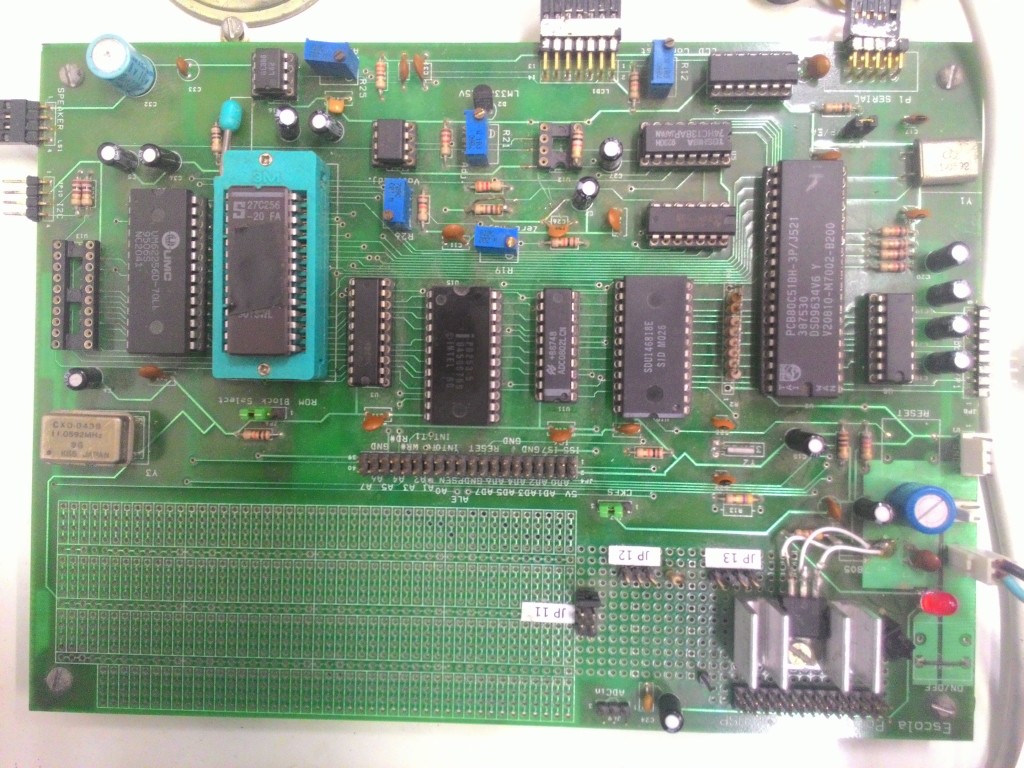
These educational boards contained lots of interesting things built around an 8051 CPU. They even had a tiny LCD panel (which surely must be the famous Hitachi HD44780, right? :-D). So I dumped the firmware of the board and snapped a picture of it. I may soon write a skeleton driver for it in MAME.

Jpeg
Educational board: PCS2497 Escola Politécnica USP — These 8051-based boards are used in digital electronics classes at the university laboratory.

After our conversation, Daniel, the technician, tried to introduce me to a few of the computer engineering professors because he was getting a lot of interest in doing something with emulators in the laboratory classes. And I am also interested in giving a talk there soon about MAME, reverse engineering, technical education and emulation, of course. But the professors were not at their offices, so we agreed to meet again in the near future to talk more about this stuff.

joao-jose-neto
Professor João José Neto, one of the designers of Patinho Feio, the first Brazilian computer.

So, I though I had already collected Jackpot for the day and I was considering to go back home. But I remembered professor João José Neto (one of the minds behind the “Patinho Feio”, the first computer designed and manufactured in Brazil, in the early 70s) might be at his office, so I though it could be worth to get there and say hello.

And indeed he was there and received me with a big welcoming smile. We spent half an hour talking about old computers, and how things gradually get lost because most people don’t care. So I tried to convince him to help me figure out where the remaining old-machines designed by him and his colleagues decades ago might be nowadays, so that we could try to restore them and also to emulate them, for the sake of historical preservation.

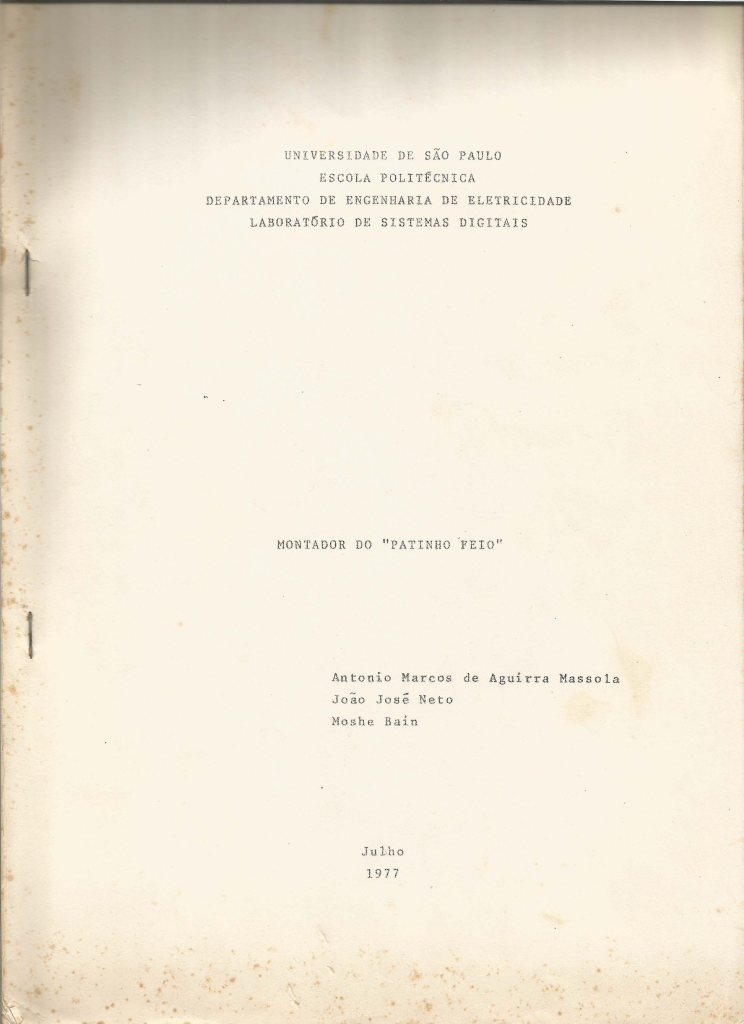
When I was leaving the room, after a warm conversation, I mentioned we would gladly digitize old technical materials as well. So, he went back into his office and then back to the front door and deposited in my hands a copy of a technical documentation of the Patinho Feio Assembler. I was shocked. I asked it and he confirmed: it was the single copy of the document he was aware of and it was dated July 1977. And he wanted me to take it away with me for proper digitizing.

pagina_0_capa

I got really happy and honoured with the gesture. But at the same time, I felt fearful of making some silly mistake. So I came back directly to my home planning to digitize it as quickly as possible so that we have a digital backup of this material. My plan is to publish it on the Internet Archive as soon as I get it all scanned. It’s a 1cm thick block of pages, all in classic type-writer style. (it does not seem to be the original, but just a copy of it) It will take some time until I get this all done, but I feel that I have the duty to do it correctly. And I am proud of having this opportunity.

Next obvious step would be to implement the CPU emulation module for the Patinho Feio in MAME, but I won’t even try that before getting the whole thing scanned and published.


Happy Hacking!

Felipe “Juca” Sanches

Another World bytecode disassembly

I’m again fiddling with the Another World / Out of this World virtual machine.

European logo of Another World / Out of This World

Around an year and a half ago I have forked fabiensanglard’s Another-World-Bytecode-Interpreter on github and made a few patches on branches of my personal fork. The code I implemented was developed while hosting the then-weekly reverse engineering workshop called “Oficinas de Retroprogramação” at Garoa Hacker Clube, the local hackerspace here in São Paulo, Brazil.

The “hack_monitor_threads” branch allows one to interactivelly freeze/unfreeze threads in realtime in the virtual machine, in a way that allows some very interesting kinds of investigation on the meaning of each thread in the game code. Read the patches to learn how it works. I’d invite all of you to try it on the first game scene (the one in which professor Lester swims out of the lake). It is fun!

hint: thread #8 controls the behavior of the snake that kills Lester by pulling him back into the lake. You probably should freeze it as quickly as possible so that you can continue experimenting with the other threads without having to worry about the snake killing you.

The “extractor” branch contains code for dumping decompressed binary resources as well as disassembled “source” files. That code was outputing a few “unknown opcode”s. So, yesterday I got interested in it again and figured out that there are special video-rendering related opcodes that I was not parsing yet. So last night I made a few more commits implementing these, which seem to partially work. I still get some unknown opcodes and now I don’t know why. Perhaps it is a bug in my parsing routines. I’d appreciate if anyone could take a look at it as well. Once I have further progress in this mini-project I can post here again with more insights.

happy hacking,

Felipe “Juca” Sanches
 

Dumping gear: TL866CS

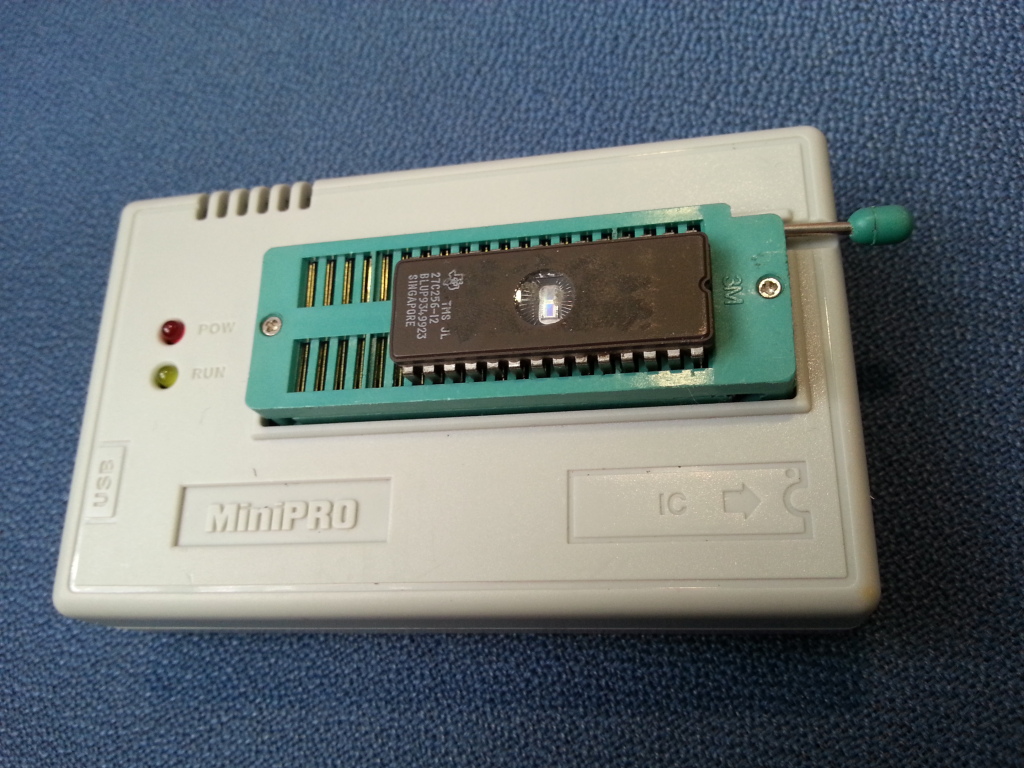
MiniPro TL866CS Universal IC Programmer

One key element in emulation is ROM dumping. This is the process by which we are able to extract the contents of a memory chip such as an EPROM or the internal memory of a microcontroller.

When I started to learn emulation, I did not have access to proper ROM dumping equipment, so I resorted to building my own ROM dump circuitry around the Arduino. The result was a tangle of wires in a breadboard. It worked OK yielding valid results, but it was a slow procedure requiring manual post-processing of the data and it had to be reassembled from scratch everytime I needed to dump something. I would not trust a bunch of messy wires left aside for a week in a breadboard. I would prefer to spend something around 15 minutes to half an hour reassembling the circuit to be sure it was  in good condition to be used.

The process of designing my own ROM dumper and building it from scratch (several times) was, for sure, aligned with the DIY mindset and helped me grasp the technology. But I needed something more reliable so that I could move on to other larger emulation challenges. So I went after a pre-assembled, commercial unit and I found a nice review of the Minipro TL866CS at the EEVBlog.

I was aware that it would only work with the crappy proprietary host application provided by the chinese manufacturer, but I was willing to delve into USB sniffer-based reverse engineering in order to write my own tools to use it, so I ordered one of these, anyway.

While I was waiting for the package to arrive from China, though, I discovered that the Ukrainians were faster and a hacker had already reverse engineered the protocol and released a free software program to operate the TL866CS. Yay!!! 🙂

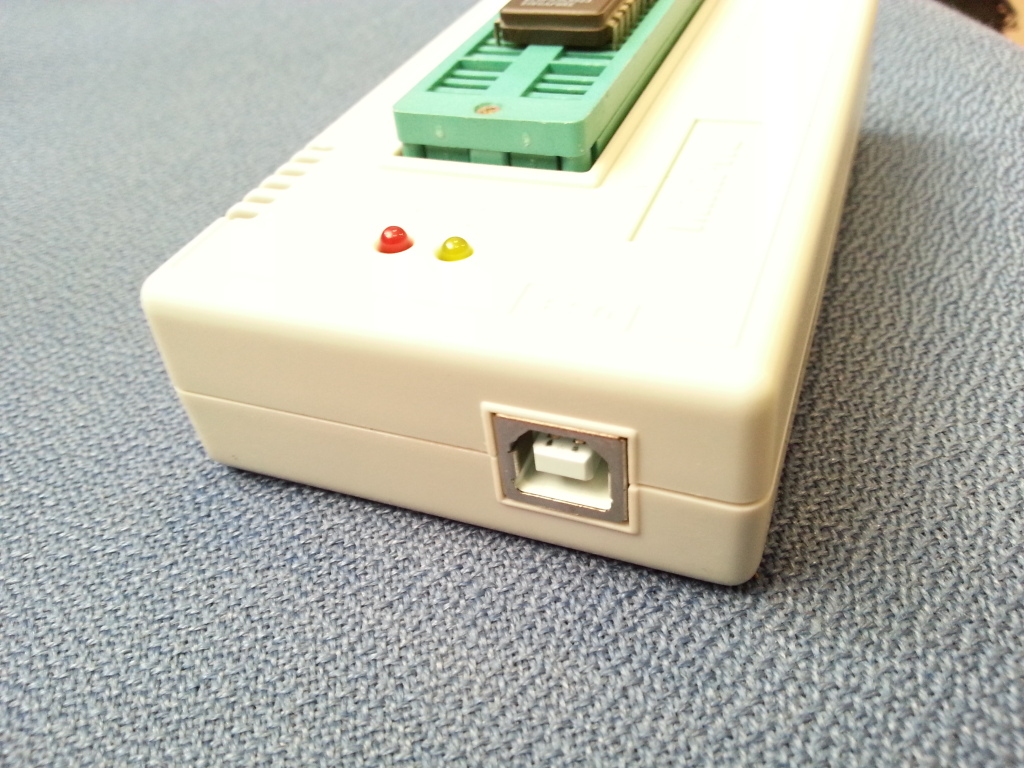
So, this has been a very handy tool to me, since then. It is able to both dump and also write to an enourmous variety of memory chips (including the internal memory of several models of microcontroller chips). The fact that it operates over USB is very handy for modern computers. The older dumping/programming devices used to rely on interfaces such as serial and/or parallel ports, or other proprietary interfaces which are not easily accessible anymore nowadays.

Minipro's handy USB interface.
Minipro’s handy USB interface.

And as the TL866CS is small and lightweigh, I always carry it (and a USB cable) on my backpack, so I’m ready to dump whatever cool device I may stumble upon in a casual day 🙂

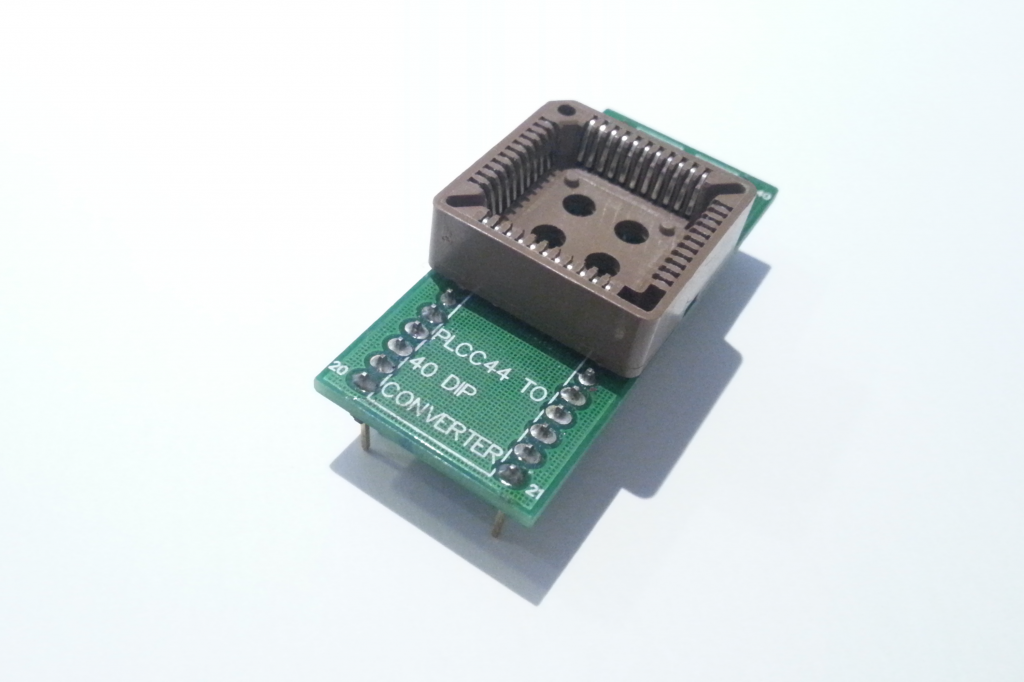
The ZIF (Zero Insertion Force) socket on top of the TL866CS allows me to work with chips in DIP packaging. There were some situations in which I had to dump chips with other packaging types, such as the 8051 microcontroller used in the Ultratec Minicom IV, which is a PLCC44 chip. For that, I have bought the PLCC44 to DIP40 adapter shown below:

PLCC44 to DIP40 adapter.

There are other adapters available for other packages such as PLCC32, TSOP, etc. But some of these are pretty much expensive, so I only plan to buy them whenever I really need them.

I am extremely happy with this programmer/dumper. There is only one pending issue with it, in my opinion. It is great that it operates with free software (“free as in freedom”) under GNU/Linux, on the command line. It would be nice to have a graphical user interface, but not really essential. The tricky problem that really still remains to be solved is the fact that all of the “intelligence” of the device is actually inside its firmware and not in the host application.

The algorithms for supporting the dumping and programming of the several thousands of chips supported are implemented in the internal firmware, running on a PIC microcontroller. And in some cases we may need to deal with chips that are not yet officially supported by the TL866CS proprietary firmware. I think it would be great to have a free software implementation of firmware for the TL866CS, so that we could add support for other chips. Also, by having free firmware, the TL866CS could potentially be used for other purposes as well. One idea would be to use it as a testing bench for verifying if a chip is properly working.

PenseBem / SmartStart

PenseBem_FSanches
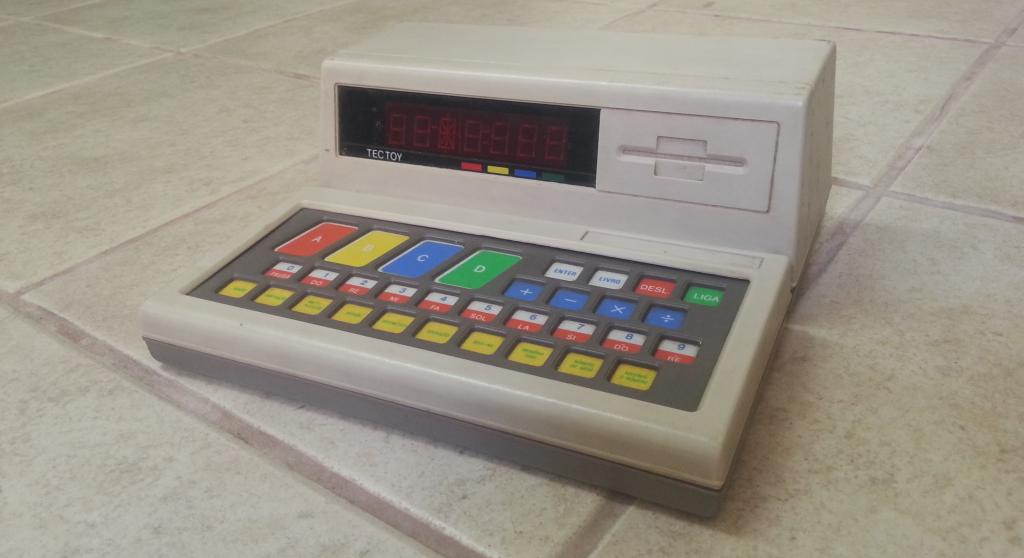
Pense Bem by TecToy – Brazil

I’ve been in contact with the MESS project for a few years already, so it is a bit hard to decide which specific emulated device should I talk about first when starting this new blog. It seems to me that the best way to start would be perhaps by talking about the way I first got in contact with the project.

Back in 2010 I was, for some reason I can’t remember anymore, starting to get interested in emulation. It is probably related to the fact I had been hanging out with Ricardo Bittencourt (a.k.a. RicBit) at the university laboratory. RicBit is the author of a famous MSX emulator called BrMSX. It was fully implemented in x86 assembly language, which is quite impressive. The source code is listed here (I wish it had a free software license attached to it… :-D).

So, I started wondering whether it would be possible for me to be part of the emulation community by writting my own emulator. It was just not clear to me back then what was yet left to be emulated. (nowadays I know the answer is: “a whole lot of stuff !”) I tried to map all of the video-game consoles I had been in contact with since childhood and it seemed to me that everything was already emulated, so it was a bit frustrating at first to think about it.

But then I remembered this old children toy called PenseBem (which later I figured out was called SmartStart in the US). Here in Brazil it was manufactured by TecToy. By the way, the expression “pense bem”, in portuguese means something like “think carefully”, instead of “smart start”.

I checked out the MAME source code, started looking at it and learning how it works and wondered how could I adapt it to emulate the PenseBem toy. Then a friend told me about MESS and why it was better suited to my purpose, i.e. emulating something that is not an arcade game.

About one year later, while spending a weekend at the local hackerspace (Garoa Hacker Clube, in São Paulo, Brazil), me and my friend Leandro Pereira decided to resume the project and we finaly disassembled a unit of this toy that had surfaced in the hackerspace pile of random electronics stuff.

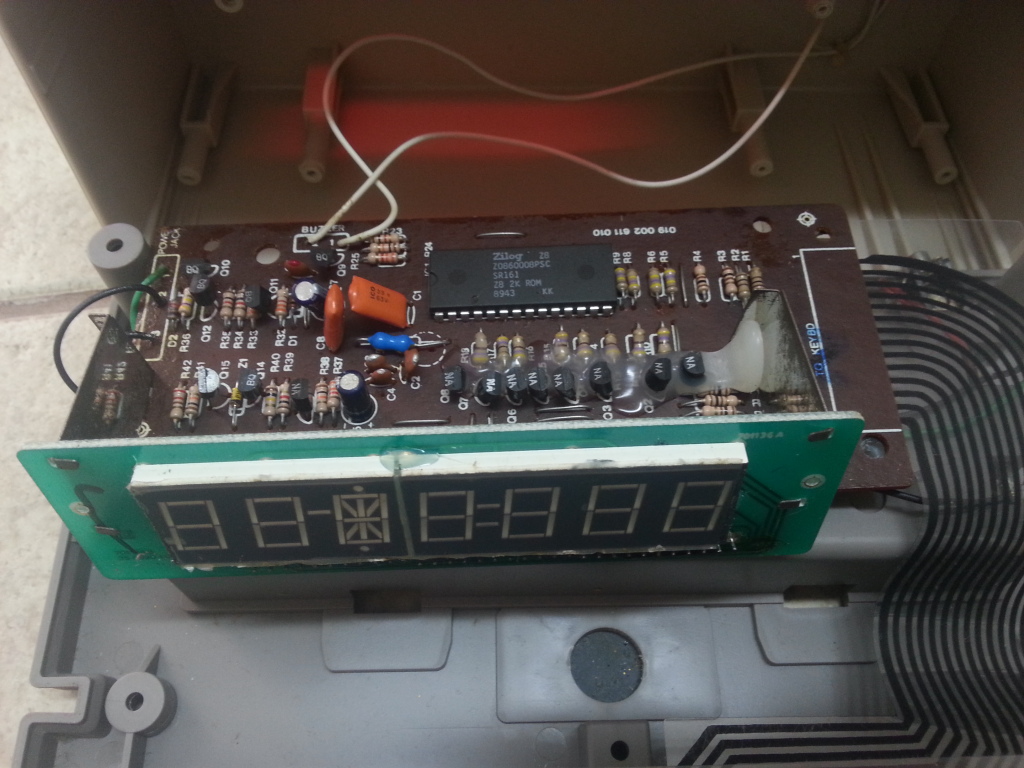
PenseBem/SmartStart PCB
PenseBem PCB

When we opened it we faced a very simple circuit. The most proeminent component was a Z8 microcontroller. I was used to Z80 assembly coding (because of the MSX computer I had when I was a child and also due to some optimization work of typography rendering we were doing at the lab at the university) so I was excited to take a look at the firmware disassembly of the toy. I was expecting that the Z8 code would probably look similar to the Z80 routines I was used to.

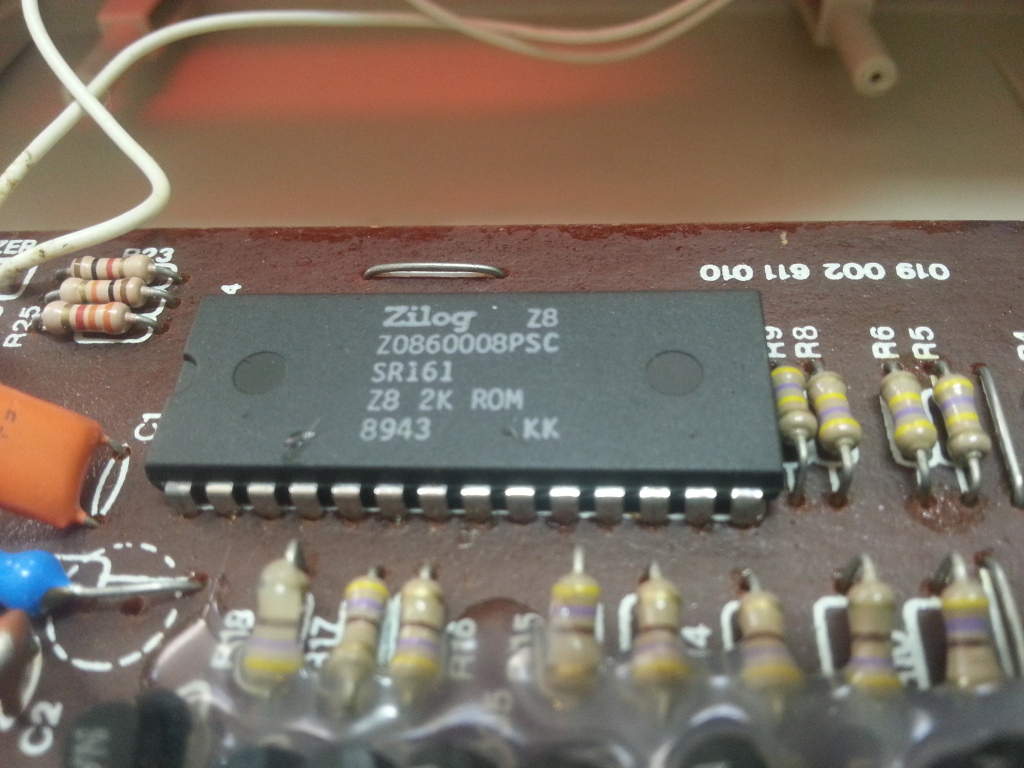
Unfortunatelly, we couldn’t figure out a way to dump the device. We did not find an exact datasheet for that part number (Z0860008SC), and while  looking at Zilog documentation for other similar Z8-based chips, we could not find a way to dump it. Apparently the internal memory containing the firmware is written at the factory and not meant to be neigther updated nor dumped. My guess is that there are not even data/address lines tied to pins in the chip DIP28 packaging.

Z8 Microcontroller used in PenseBem/SmartStart
Z8 Microcontroller used in PenseBem

Since it seemed impossible to dump the firmware (without nitric acid :-P) it meant real emulation would not be possible. So we decided to at least simulate the device by reimplementing its functionality, based on our observations. There was some reverse engineering effort already done by Eduardo Habkost, who mapped the overall behaviour of the random number generator used by the toy to generate the list of correct answers to the questionnaires that were employed in the toy.

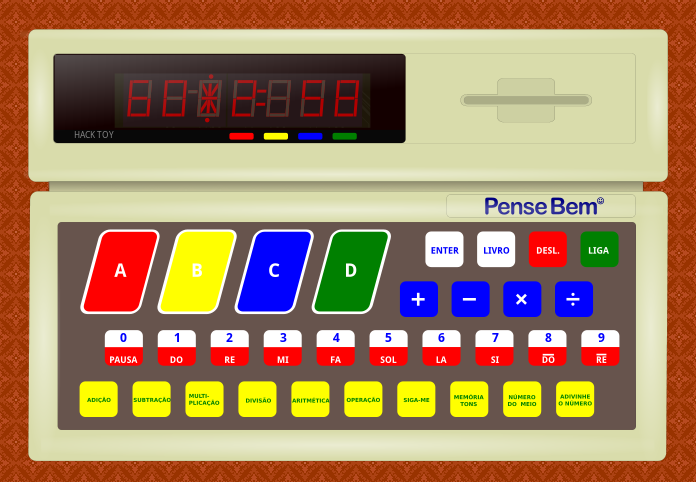
Based on Eduardo’s findings we started working on a javascript implementation of the simulator. I was deeply involved in the Inkscape development team, so SVG was my natural choice for creating the graphical interface. The SVG file contained the artistic representation of the PenseBem/SmartStart console. It also had javascript event handlers attached to certain vector objects so that when you open the SVG file in a modern web-browser you can actually interact with it. Javascript is used to implement the actual behaviour. Visual feedback is provided by changing the color of the 14-segment display segments. We used the HTML5 audio element and API to programmatically generate the square wave tones.

screenshot of the PenseBem simulator
PenseBem simulator

Here’s the first commit of the SVG + JS simulator and here is the latest source code. One can run the simulator by loading the website we have set up for it: http://labs.hardinfo.org/pb/

In the website we have some more technical info on the project, but I pretty much cover the most important aspects here. I still hope that someday we’ll find a way to properlly dump the Z8 microcontroller. Leandro even dropped one of these to a fellow hacker in a conference in Europe a couple years ago in the hope he would try the nitric acid approach he’s supposedly skilled at. But surely he’s got priorities on which chip to decap next, so an obscure children toy from the eighties may not be in the top of his TO-DO list…

I have seen a few devices in the MESS source code that use a Z8 chip, so I guess someone may already master the technique of dumping these without the need of chip decapping. It would be great to have some input from the community on that.

Happy hacking, Felipe Sanches

PS: On my next posts I plan to talk about devices I was able to actually emulate as part of my first contributions to the MESS project.