Dumping gear: TL866CS

MiniPro TL866CS Universal IC Programmer

One key element in emulation is ROM dumping. This is the process by which we are able to extract the contents of a memory chip such as an EPROM or the internal memory of a microcontroller.

When I started to learn emulation, I did not have access to proper ROM dumping equipment, so I resorted to building my own ROM dump circuitry around the Arduino. The result was a tangle of wires in a breadboard. It worked OK yielding valid results, but it was a slow procedure requiring manual post-processing of the data and it had to be reassembled from scratch everytime I needed to dump something. I would not trust a bunch of messy wires left aside for a week in a breadboard. I would prefer to spend something around 15 minutes to half an hour reassembling the circuit to be sure it was  in good condition to be used.

The process of designing my own ROM dumper and building it from scratch (several times) was, for sure, aligned with the DIY mindset and helped me grasp the technology. But I needed something more reliable so that I could move on to other larger emulation challenges. So I went after a pre-assembled, commercial unit and I found a nice review of the Minipro TL866CS at the EEVBlog.

I was aware that it would only work with the crappy proprietary host application provided by the chinese manufacturer, but I was willing to delve into USB sniffer-based reverse engineering in order to write my own tools to use it, so I ordered one of these, anyway.

While I was waiting for the package to arrive from China, though, I discovered that the Ukrainians were faster and a hacker had already reverse engineered the protocol and released a free software program to operate the TL866CS. Yay!!! 🙂

So, this has been a very handy tool to me, since then. It is able to both dump and also write to an enourmous variety of memory chips (including the internal memory of several models of microcontroller chips). The fact that it operates over USB is very handy for modern computers. The older dumping/programming devices used to rely on interfaces such as serial and/or parallel ports, or other proprietary interfaces which are not easily accessible anymore nowadays.

Minipro's handy USB interface.
Minipro’s handy USB interface.

And as the TL866CS is small and lightweigh, I always carry it (and a USB cable) on my backpack, so I’m ready to dump whatever cool device I may stumble upon in a casual day 🙂

The ZIF (Zero Insertion Force) socket on top of the TL866CS allows me to work with chips in DIP packaging. There were some situations in which I had to dump chips with other packaging types, such as the 8051 microcontroller used in the Ultratec Minicom IV, which is a PLCC44 chip. For that, I have bought the PLCC44 to DIP40 adapter shown below:

PLCC44 to DIP40 adapter.

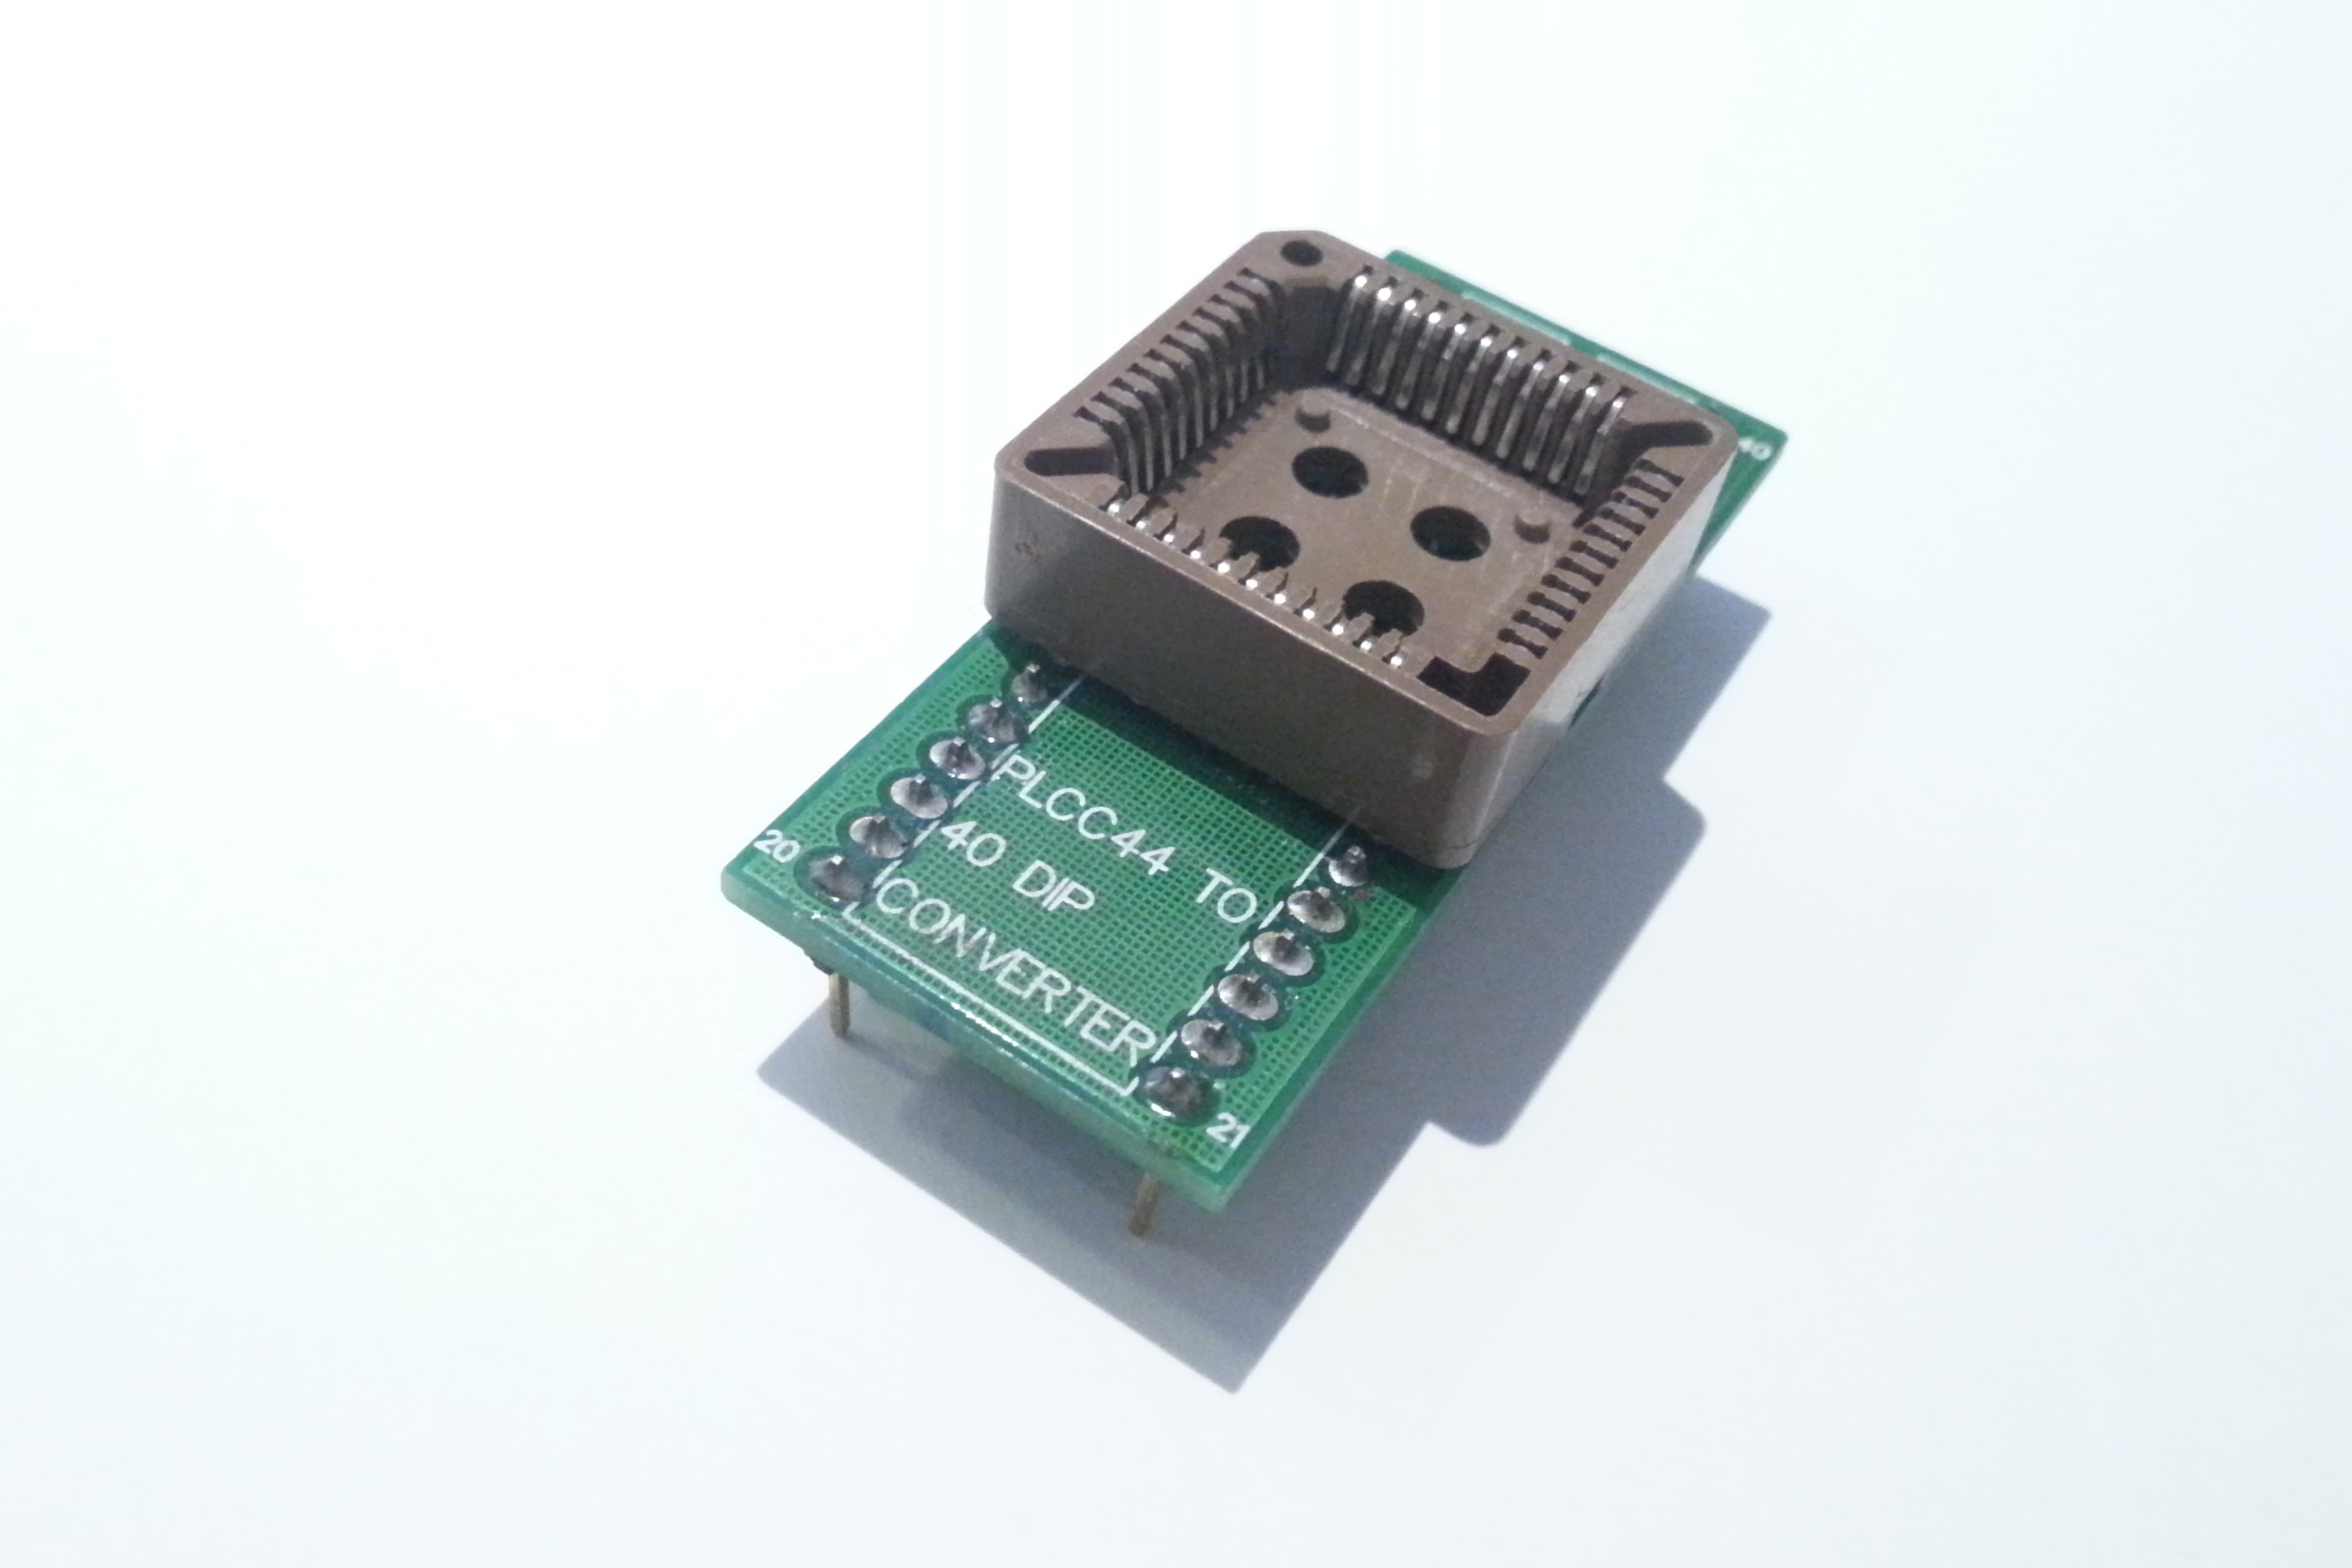
There are other adapters available for other packages such as PLCC32, TSOP, etc. But some of these are pretty much expensive, so I only plan to buy them whenever I really need them.

I am extremely happy with this programmer/dumper. There is only one pending issue with it, in my opinion. It is great that it operates with free software (“free as in freedom”) under GNU/Linux, on the command line. It would be nice to have a graphical user interface, but not really essential. The tricky problem that really still remains to be solved is the fact that all of the “intelligence” of the device is actually inside its firmware and not in the host application.

The algorithms for supporting the dumping and programming of the several thousands of chips supported are implemented in the internal firmware, running on a PIC microcontroller. And in some cases we may need to deal with chips that are not yet officially supported by the TL866CS proprietary firmware. I think it would be great to have a free software implementation of firmware for the TL866CS, so that we could add support for other chips. Also, by having free firmware, the TL866CS could potentially be used for other purposes as well. One idea would be to use it as a testing bench for verifying if a chip is properly working.

PenseBem / SmartStart

PenseBem_FSanches
Pense Bem by TecToy – Brazil

I’ve been in contact with the MESS project for a few years already, so it is a bit hard to decide which specific emulated device should I talk about first when starting this new blog. It seems to me that the best way to start would be perhaps by talking about the way I first got in contact with the project.

Back in 2010 I was, for some reason I can’t remember anymore, starting to get interested in emulation. It is probably related to the fact I had been hanging out with Ricardo Bittencourt (a.k.a. RicBit) at the university laboratory. RicBit is the author of a famous MSX emulator called BrMSX. It was fully implemented in x86 assembly language, which is quite impressive. The source code is listed here (I wish it had a free software license attached to it… :-D).

So, I started wondering whether it would be possible for me to be part of the emulation community by writting my own emulator. It was just not clear to me back then what was yet left to be emulated. (nowadays I know the answer is: “a whole lot of stuff !”) I tried to map all of the video-game consoles I had been in contact with since childhood and it seemed to me that everything was already emulated, so it was a bit frustrating at first to think about it.

But then I remembered this old children toy called PenseBem (which later I figured out was called SmartStart in the US). Here in Brazil it was manufactured by TecToy. By the way, the expression “pense bem”, in portuguese means something like “think carefully”, instead of “smart start”.

I checked out the MAME source code, started looking at it and learning how it works and wondered how could I adapt it to emulate the PenseBem toy. Then a friend told me about MESS and why it was better suited to my purpose, i.e. emulating something that is not an arcade game.

About one year later, while spending a weekend at the local hackerspace (Garoa Hacker Clube, in São Paulo, Brazil), me and my friend Leandro Pereira decided to resume the project and we finaly disassembled a unit of this toy that had surfaced in the hackerspace pile of random electronics stuff.

PenseBem/SmartStart PCB
PenseBem PCB

When we opened it we faced a very simple circuit. The most proeminent component was a Z8 microcontroller. I was used to Z80 assembly coding (because of the MSX computer I had when I was a child and also due to some optimization work of typography rendering we were doing at the lab at the university) so I was excited to take a look at the firmware disassembly of the toy. I was expecting that the Z8 code would probably look similar to the Z80 routines I was used to.

Unfortunatelly, we couldn’t figure out a way to dump the device. We did not find an exact datasheet for that part number (Z0860008SC), and while  looking at Zilog documentation for other similar Z8-based chips, we could not find a way to dump it. Apparently the internal memory containing the firmware is written at the factory and not meant to be neigther updated nor dumped. My guess is that there are not even data/address lines tied to pins in the chip DIP28 packaging.

Z8 Microcontroller used in PenseBem/SmartStart
Z8 Microcontroller used in PenseBem

Since it seemed impossible to dump the firmware (without nitric acid :-P) it meant real emulation would not be possible. So we decided to at least simulate the device by reimplementing its functionality, based on our observations. There was some reverse engineering effort already done by Eduardo Habkost, who mapped the overall behaviour of the random number generator used by the toy to generate the list of correct answers to the questionnaires that were employed in the toy.

Based on Eduardo’s findings we started working on a javascript implementation of the simulator. I was deeply involved in the Inkscape development team, so SVG was my natural choice for creating the graphical interface. The SVG file contained the artistic representation of the PenseBem/SmartStart console. It also had javascript event handlers attached to certain vector objects so that when you open the SVG file in a modern web-browser you can actually interact with it. Javascript is used to implement the actual behaviour. Visual feedback is provided by changing the color of the 14-segment display segments. We used the HTML5 audio element and API to programmatically generate the square wave tones.

screenshot of the PenseBem simulator
PenseBem simulator

Here’s the first commit of the SVG + JS simulator and here is the latest source code. One can run the simulator by loading the website we have set up for it: http://labs.hardinfo.org/pb/

In the website we have some more technical info on the project, but I pretty much cover the most important aspects here. I still hope that someday we’ll find a way to properlly dump the Z8 microcontroller. Leandro even dropped one of these to a fellow hacker in a conference in Europe a couple years ago in the hope he would try the nitric acid approach he’s supposedly skilled at. But surely he’s got priorities on which chip to decap next, so an obscure children toy from the eighties may not be in the top of his TO-DO list…

I have seen a few devices in the MESS source code that use a Z8 chip, so I guess someone may already master the technique of dumping these without the need of chip decapping. It would be great to have some input from the community on that.

Happy hacking, Felipe Sanches

PS: On my next posts I plan to talk about devices I was able to actually emulate as part of my first contributions to the MESS project.